I haven't posted much because life has been hectic and I've been working on one massive project- Junebug's bedding. I want to wait to post any pictures until the entire set is done and so far I'm mostly done with the first crib sheet and I've started the second crib sheet, the bumpers and the mobile. LOL I've "started" a lot!
Anyways, if you're an avid crafter/sewer you probably knew about JoAnns big sale last week. Well I bought a BUNCH of stuff (thank goodness for tax returns!). This weekend I was just itching to make something. And not a huge project to start that would just add to my pile of "stuff", but something I could knock out in the afternoon and be proud of =P So yesterday morning I was online looking through my favorite blogs for a cutesy, quick project that I could make for my Pumpkin. As I was looking, she interrupted to ask me to tuck her baby's blanket into her shirt to make a cape. (lightbulb!) So, then I quickly searched for a pattern and decided I was ready to head to JoAnns!
I found Treasures for Tots's Superhero or Knight's Cape Tutorial and thought it was great- not too simple and boring but not to detailed either. I did decide to step it up and make it reversible.... because I wanted to be cool like that, haha!
So I didn't take too many pictures, because I knew I'd be giving a linkback to Angie's tutorial, but it turns out making it reversible adds a bit of work to the steps, so I kind of wish I had taken more pics, but it's too late now! Here's what I do have:
After printing and assembling the pattern from Treasures for Tots, I cut it out of both of my fabrics (remember I made it reversible, so I needed two):
With the RIGHT sides facing together, sew along the edges:
Where the cape has curves, clip a few notches so that when you turn it right side out it will lay flat:
After turning it right side out, iron the edges for a nice, flat look:
I purposely chose a solid color for one side, so that I could put my Pumpkin's first initial on that side (using the scrap fabric from the other side, of course):
[to keep it simple I just used Wunder Under and ironed the "A" on, I didn't even bother sewing it]
Iron in place:
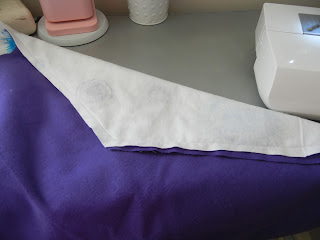
Now comes the part I didn't think through 100% as I made the changes in my head... I knew I'd need extra fabric of the one piece to make a casing for the ribbon but the curve threw me off. I had just cut an extra inch thinking I could just fold it down. But if you try to fold this down it didn't work..... Hence, the scissors! I trimmed the two corners, so that the white material was straight across the top.
Then I folded it down, and ironed it:
I also pinned it in place until I sewed the casing shut:
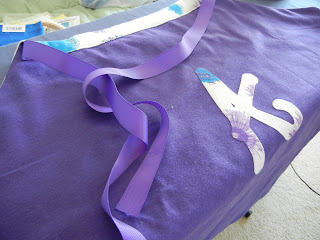
I just used a simple coordinating ribbon for the tie:
Thread the ribbon through:
Here's one side:
And the other:
I can't wait for my Pumpkin to get up from her 'quiet time' so she can try it on!!! Share your pictures if you decide to make one =)
*EDIT* My Pumpkin wearing it (she LOVES it):
Sunday, April 17, 2011
Subscribe to:
Comments (Atom)


