Showing posts with label pinterest. Show all posts

Saturday, March 30, 2013

Hard Baked Eggs... huh?

So, in the land of Pinterest we often pin things "for later". Occasionally, when "later" rolls around I actually remember to look them up. One of my "laters" is Easter. Pssst, guess what? Easter is TOMORROW! Holy crap, that snuck up on me! So it's time to decorate eggs with the kids. Here's the thing- I really don't like boiling the eggs. It stresses me out! What if I cook them too long, not long enough, they crack, etc. There's a billion different ways to do it if you google and a lot of people just tell me they wing it every time. Whoa! This girl needs a step by step recipe!

So I had repinned this one thing from "Greetings From The Asylum" about baking your "hard boiled" eggs. That's right, BAKING them. I had pinned it (a couple times, I think), in hopes I'd remember o go back before Easter and look into this method. So tonight before dinner I sat down and read the post explaining what this is all about. Thank you, Alton Brown!

There were many comments on the original post asking if baked eggs could be used for dying at Easter time. No one knew! The original Blogger had only ever made them for recipes. Now was as good a time as any to find out! I baked my one dozen eggs according to the directions.

Alton Brown's Baked Eggs
Prep Time: 2 min.
Total Time: 32 min.
Ingredients:
2 - 4 dozen eggs
DIRECTIONS:
  1. Preheat the oven to 325 degrees.  Position the oven racks in the center of the oven.
  2. Place the eggs parallel to the bars on the racks.  (see picture below)
  3. Place a baking sheet pan in the bottom of the oven (just in case an egg breaks).  I have never had a mess in my oven in all the times I have made this recipe.  I have had eggs break, but they cooked inside when they do so there is no mess
  4. Bake for 30 minutes.
  5. When the eggs are done, fill a large bowl with ice water and move the eggs into the bowl.  I do this a few minutes ahead of time to make sure the water is COLD!
  6. Peel the eggs as soon as they're cool enough to handle, then return them to the ice water to thoroughly chill.  I think that the eggs are easier to peel if they are allowed to chill in the water for at least 10 minutes.  Also, I peel the eggs under cool running water.  
 This recipe works best with the freshest eggs you can find.
Before I let my Pumpkin & Junebug start dying, I figured I'd try one egg to make sure the process worked for me, just in general. Then I would know if it was the baking that messed up the dying or vice versa. Holy crap! That egg I tasted was amazing! Peeling it under cold running water made it so easy and it was PERFECT. I'll never boil another "hard boiled" egg!

The kids went ahead and dyed the eggs and they look perfectly normal! This pin definitely came through for me!

Friday, March 29, 2013

Bunny Bait

First off, man have we gotten behind on our project 52 posts! Don't worry- good things still happening just need to post. =)

Couldn't resist taking a break to share another Pinterest find! Tonight we made "bunny bait"!  It's so cute and SO easy. I'm assuming it'll be super yummy when we finally dive into it, too!

First gather your popcorn (popping your own would be better, but they only had buttery when I ran into Target), pretzel sticks, m&ms and white chocolate:


Find some helpers, but make sure they don't eat all the ingredients, like mine!


Mix it all in the bowl (break the pretzels in half) and then pour the melted chocolate on top and stir to mix well. Spread it on wax paper to cool and break apart to enjoy!


Thanks to Sing For Your Supper for the recipe!!!


Friday, February 22, 2013

Flashback: Pinterest success!

Today I wanted to do a 'flashback' post to this idea I found on Pinterest that came out so cute! Last summer I made this circle map thing I found on a 1st grade teacher's blog (via Pinterest). It came out so well and my Pumpkin loved it. She still plays with it 8 months later! Here's the original post. This is what we made:


Thursday, February 14, 2013

Valentine's

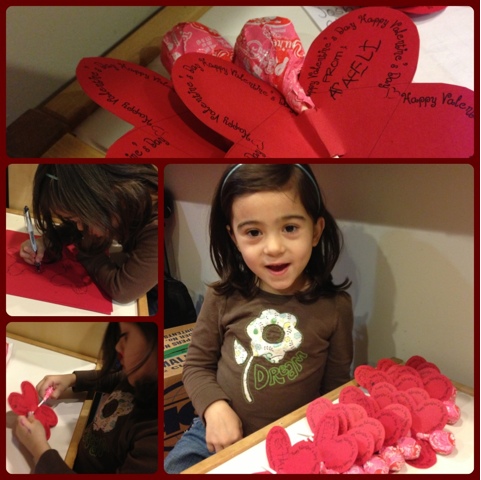
Last night my little Pumpkin got to stay up late to write her Valentines. She worked very hard to write each of her 14 classmates' names (some of which she knew how to spell without help!!) and both of her teachers' names, as well as writing her own name 16 times on the "from" line.

Mama cut out each butterfly, but she filled them with the suckers! Thanks to Skip to my Lou for the free download!

Monday, January 21, 2013

p52 | Week 3

I don't know if I should count this, because it's technically not so 'random' but I made dinner for a co-worker's family. He's been in and out of the hospital with pneumonia and pleurisy and it's been a rough few weeks for his family, especially since they have little ones. A few co-workers signed up for days to make meals for the family, so I jumped on the opportunity.

I made what has become my go-to make ahead meal for other families. (I've also given it to families with new babies.) I made cheesy chicken enchiladas, a recipe I found on Pinterest over a year ago. It's pretty easy and SUPER yummy. In fact, I made a double batch, so that my own family could have it for dinner the next night, too!

It's super easy to give as a meal paired with chips & salsa. I also threw in a cake for this family that I had picked up in the bakery when grocery shopping. =)

So, that's all. Nothing major but I think it's great to help out whenever you can!

Monday, January 7, 2013

p52 | Week 1

Project 52: Week 1

As I posted previously, I was really excited to start this Project 52: 52 Random Acts of Kindness. I've been talking it up a lot with my Pumpkin (Junebug just stares at me and laughs...) and trying to explain to her why were doing this. At first she was confused,  thinking we were giving Christmas presents, but now she's starting to understand more and getting excited, too! She's even come up with a few ideas of her own for the Random Acts, which I think is just awesome.

For Week 1, it was a little last minute, but I'd planned it that way. I wanted the first one to be for the kids' teachers at their school/daycare. We didn't go back from break until the 7th so that's why it was the tail end of week 1.


I created this printable of cards. There are lots of free printables out there already, if you just do a search for 'project 52' or 'random acts of kindness', but I wanted to create an original =) and it's available for you to download, as well.

So, I cut up the cards and mixed up some goodies (Tastefully Simple's Blue Ribbon Blueberry Bars, yum!) and in the morning we delivered them to the kids' teachers. Pumpkin was so excited and spent the whole day asking each teacher she saw if they'd had a special snack from us! Week 1: success!


Friday, December 28, 2012

Project 52 | Random Acts of Kindness

Twice now I have tried -and failed -at project 365, you know the one, you take a picture a day for a year. It really never should've been that hard for me since I take pictures- all. the. time. But alas... I never did make it.

If at first you don't succeed, try, try again... but first lower the bar. HaHa! This year I (along with the kidlet) will tackle Project 52- 1 thing a week. A little less ambition, a little more success? Let's hope! I was so torn looking for what could be the focus of my p52... I see lots out there- photography (clearly wasn't going to work), cookies (whoa now, just starting to see my waistline again), quilts (a quilt a WEEK?! I've never even finished one in my lifetime...). WHAT would I focus on?

I searched blogs, pinterest, and then I found it... Random Acts of Kindness! YES! That would be it =) 52 Random Acts of Kindness. This is perfect, too, because I can get the kidlets involved. Especially after my 4 year old's (Pumpkin) behavior at Christmas time... lack of appreciation and a bad attitude! She needs this. So, I spent quite a bit of time last night pinning different blogs and lists of RAKs and next I'm going to create my very own printable for us to use. Pumpkin's going to help me with this so that she's involved from the beginning. I'm very excited for this project!

Wednesday, July 18, 2012

1 Week of Pinterest: Days 2, 3

1 new recipe
1 project for your home
1 craft type project
1 project for your toddler
2 of your choice
1 free day/do nothing

Day 1:
1 project for your toddler. (click to view)


Day 2:
(free day)


Day 3:
1 project of your choice
This one was found on a first grade teacher's blog. She used it as review after a map unit and the kids did the creating. Since I made it for my 3 year old, I created it myself. Here's the original:


And here's ours:


I LOVE it, and so does my Pumpkin!

Monday, July 16, 2012

1 Week of Pinterest

One of my online mommy groups is doing a '1 Week of Pinterest' challenge. I'll be blogging about my projects. The requirements are simple:


In that time you must do (one a day in any order)...

1 new recipe
1 project for your home
1 craft type project
1 project for your toddler
2 of your choice
1 free day/do nothing

Day 1:
1 project for your toddler.

Here's my inspiration. Sorry, my pin is only linked to an image, so no blog credit available. Luckily, this one is pretty self explanatory!


So, all you need is:

  • blank canvas (or paper if you want to keep it simple)
  • paint color(s) of choice
  • painter's tape
  • brush (optional)
  • drop cloth (optional)
Here's how the process went for us...

Gather your materials

We worked in the garage, but I still decided to put down a 'drop cloth' (cut up garbage bag). First, using the painter's tape, tape off your child's name or nickname. Curvy letters can be difficult!

My lil' Pumpkin decided to use just her favorite color, purple.

Give them a brush (or let them use their fingers) and let them go to town!

Encourage them to cover the whole canvas, as it will make the letters stand out more once you remove the painter's tape.

I let it dry just a little bit, and then carefully remove the painter's tape. You're left with your final masterpiece:

There ya go! Custom artwork for your little one's room =)


Saturday, May 12, 2012

Parmesan Crusted Chicken

I pin, literally, hundreds of recipes on Pinterest. Obviously, I don't have them time to make them all, but I do feel accomplished when I get the time to try one! Tonight for dinner we had Parmesan Crusted Chicken. My favorite part about this one? EASY!!! Only four ingredients and so quick. I pinned the recipe from The Enchanted Cook and I highly recommend this one for a quick go-to flavorful dish.


Photo credit: The Enchanted Cook

Tuesday, April 3, 2012

Spring Break Productivity Pt. 3

Continuation. Read Pt. 1 here and Pt. 2 here.


Teething Necklace.
My little Junebug has some seriously swollen gums right now. Poor guy is drooling everywhere, putting everything in his mouth and losing sleep. And, well, we all know when baby loses sleep, so does Mama! We've been working on nighttime, but during the day I'm constantly grabbing big sister Pumpkin's toys out of his mouth. Oh, and if you pick him up, be warned you'll be covered in slobber later!


So, when I saw this on Pinterest, I thought, "oh yay! cute AND functional." So, I got right to it! Rebekah already has written out a very simple tutorial on A Bit of Sunshine, so head over check that out. Here's the one she made:


And mine that I'm loving!


Monday, April 2, 2012

Spring Break Productivity Pt. 2

Continuation. Read Pt. 1 here.

TV Tray Ironing Board.
If you know anything about me you know I'm a complete and total pinaholic.

Pinned Image

Over Spring Break I decided it was the perfect chance to actually make some of the things I've been pin, pin, pinning away for months! One of the things I was most excited about was this tv tray turned pressing board [tutorial from Oh, Fransson!] This is of high importance since we moved my entire sewing table and set-up to the office to allow me more access to it. (When it was in the bedroom I was hardly ever able to sew, seeing as hubby was often asleep when I wanted to sew.) Since moving it to the office I didn't have an ironing board nearby.

So, I picked up a TV tray at Target for $9 and picked up some natural batting and an outdoor fabric. Armed with my brand new staple gun (see Pt. 1) I got to work. Literally a few minutes later I was the proud new owner of a personal pressing table:


Cute, right? I love it!

Sunday, April 1, 2012

Spring Break Productivity Pt. 1

In hindsight, I actually got A LOT done over Spring Break. Instead of one überlang (hehe) post about everything I thought I'd break it down. So, in no particular order, here we go...

Junebug's room.
Nevermind the fact that the boy will be 10 months old tomorrow (eep!) I'm still putting the finishing touches on his nursery. The latest addition is something I hadn't planned in advance, but rather I decided recently needed to be done to fill up some wall space! Not being very artistic (crafty, yes; artist, not so much) I decided to put the scrap fabric from Junebug's bedding and my brand new staple gun (oh the simple joys for a crafter!) to use. I picked up some economy packs of the cheapest artist canvases I could find (12" x 12"). I then cut fabric squares slightly bigger- I went with 15" x 15" so I had enough to grab and wrap around the edge for stapling. I used 4 canvases to make my arrangement, so I decided to do 2 squares of the bedding fabric and 1 square each of some fun fabrics in coordinating colors. This was easy, because I just picked up a few individual fat quarters.

Here's the final product above his changing table:


up close:


Stay tuned for more productivity!